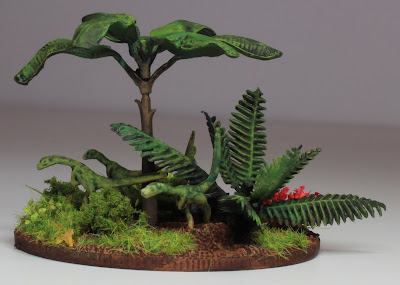
Another
‘Dinovember’ comes to a close, but not before I unveil my final entry – a homage to the Disney Classic, ‘One of our dinosaurs is missing’. This 1975 relic of my childhood sees a group of nannies outwit a Chinese spy ring in order to come to the aid of their former charge, Lord Southmere. Of its time, the film is perhaps best remembered for the theft of a Dinosaur skeleton from the National History Museum and the subsequent chase around the English Countryside as the nannies try to evade capture.
Although not the same make as portrayed in the film, I managed to track down an Atkinson 'D' Type Steam Lorry from the Matchbox 'Models of Yesteryear' range* - all I needed now was a dinosaur skeleton! My web based research wasn’t proving particularly fruitful, but I did stumble across a pack of plastic dinosaur skeletons, one of which looked as though it might be able to represent the Brontosaurus, unfortunately I hadn’t checked the dimensions!
*The Atkinson was able to travel up to 30 miles at 12m.p.h. on one tankful (170 gallons) of water.
Clearly not up for the job my new purchase, and the twelve others that came in the pack, were consigned to the terrain box** as I scratched my head, pondering a solution. I knew that I had a couple of
‘Dinosaurs in a tube’, another terrain project that has yet to see the light of day, but neither skeleton quite fitted the bill. As I stared at the cretaceous carcasses littering my paint table, inspiration finally struck! By using the tail sections of both prehistoric beasties, I was able to fashion the, almost swan like, creation I was after, after all what was in the middle didn’t matter as it was going to be covered by a tarpaulin!
**A mass of interesting odds and ends collected or purchased off the back of a convoluted plan, now long forgotten.
Now for the skull; again a rummage through the terrain box unearthed a couple of possibilities and although perhaps not an exact match for an Apatosaurus, I felt that the one chosen had a certain charm that I was looking for.
Having already let my trusty Dremel loose on the existing decals out came the airbrush and the larger areas were blasted with an appropriate colour. Once dried it was just a case of tidying everything up, building up the layers and adding some rust spots and smears. The skeleton was simply give a base and then highlights added with a dry brush.
All that remained was to base my creation. At this point I need to draw your attention to the
‘The Lazy Forger’, a terrain builder and sculptor of superior skill who, fortunately for me, had an astonishing
‘Paved Road Tutorial’ on his blog. I shan’t go into much detail here as the link will take to the tutorial proper, but it really was wonderfully simple. An etched
‘Warbases’ MDF base is given a basecoat, before more sponged colours are applied. Finally some road makings are added and the job is complete.***
***I have great plans to do some larger versions of these, none of which will see the light of day!

There are seemingly no ends to my self indulgent frippery, but as with all flights of fancy they are hugely enjoyable to put together and this, after all, is what matters. With December almost upon us, my thoughts will be turning to the
‘VI Annual Analogue Hobbies Painting Challenge’, with preparation and basing aplenty to see me through the winter months, but I’m hopeful to post a final few pieces from last year’s challenge before the end of the year.


