
As we continue with the build, James and I had considered the idea of detailing some of the interiors and rooms as part of the lecture for the pupils. At the moment the game play is limited to the exterior of the castle, the rooves, towers, walkways and gatehouses, but the interior presented too many opportunities not to explore in some detail.
We are fortunate in that there are a couple of good, first hand, reports of Castle Itter’s transformation from picturesque schloss-hotel into formidable prison. Of the existing nine rooms on the first floor, two were given over as offices for the Commander of the SS-TV detachment that formed the permanent guard and his Executive Officer. There was an additional private lounge for the Officers and a latrine and we decide that this suite of rooms might be a good place to start our refurbishment.


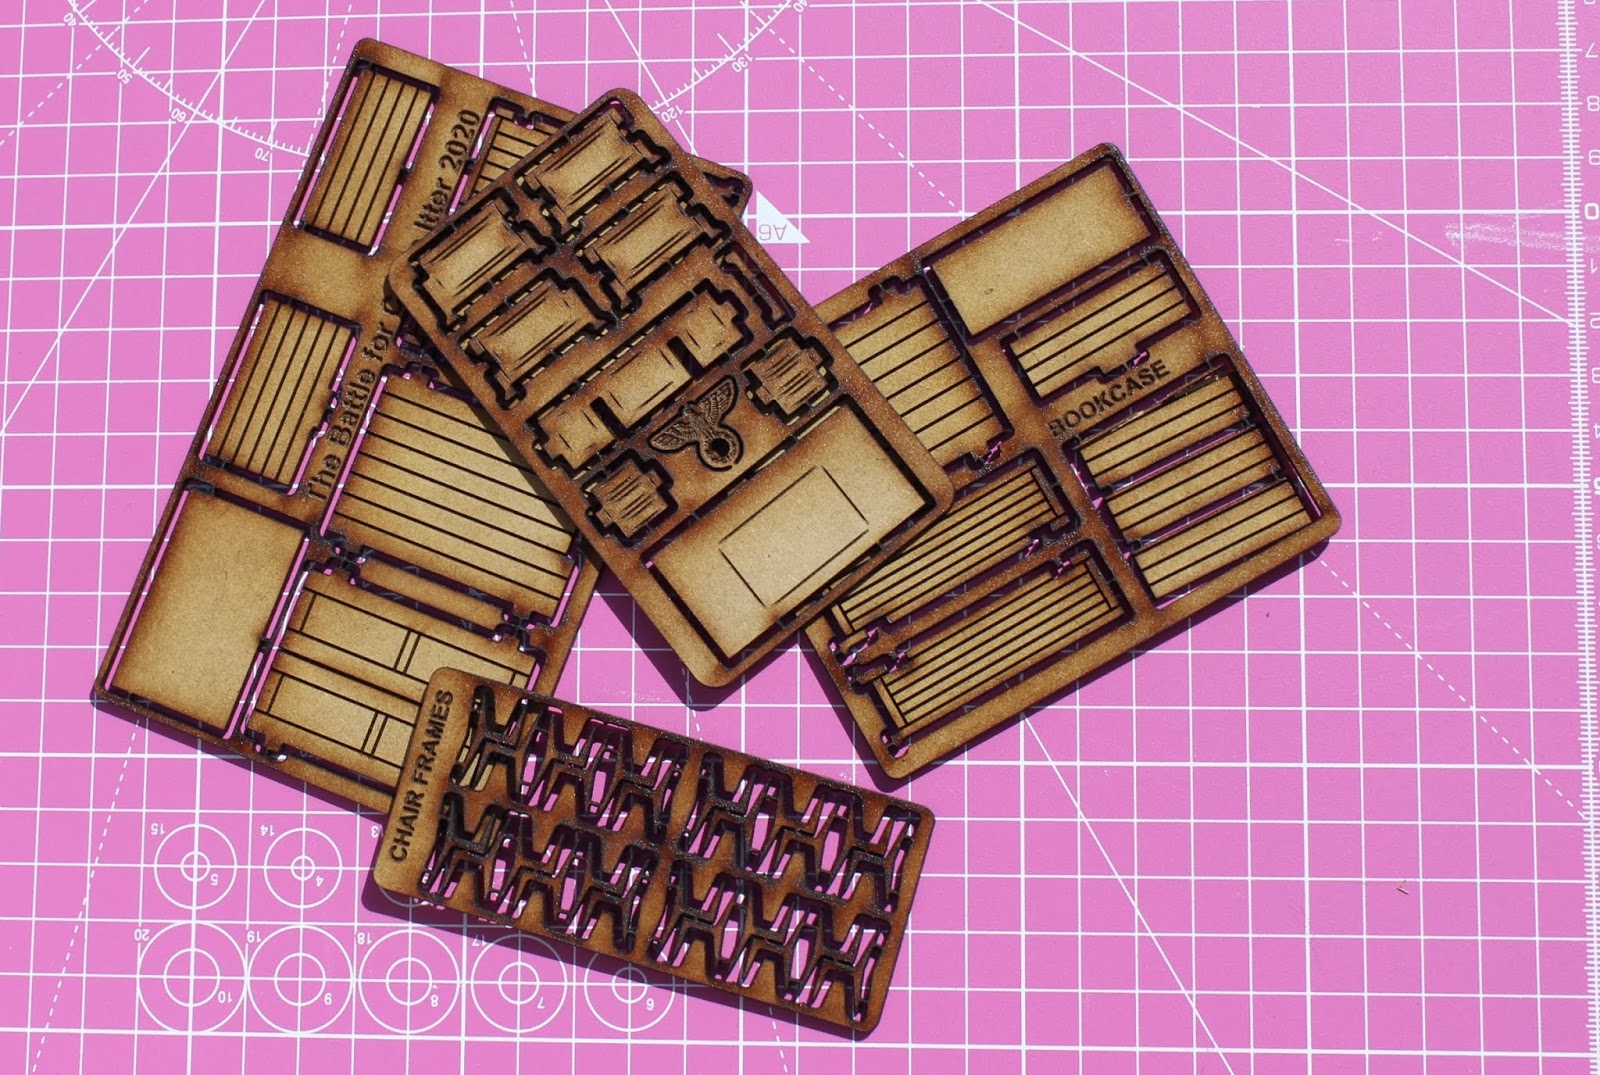
Painting an interior is all well and good, but it suddenly dawned on us that we needed were some items to put in the rooms to make them feel, well, lived in. “We’ll just make some, what do you need?" Now there's an offer you can't refuse and before I could say, “flat, pack, furniture”, James had designed and cut a series of sprues to furnish the office of the high command. We had a set of shelves, a cupboard or wardrobe, a set of chairs and a rather splendid office desk.

The chair sprue gives you a couple of options in that you can press out a couple of shapes and then cut some card for the back and seat or perhaps stick four together for a much more sturdy piece. Ingenious! I couldn't resit adding a rail to the inside of my wardrobe, by using some plastic rod, but all of this is optional.


Painting saw much of the pieces covered in brown, a less than original choice in hind's sight, but it got the job done. I had a little fun with the office desk by adding some coffee cup rings to the surface and some scratches to the worn leather writing panel. One rather lovely surprise was just how useful the Imperial Eagle was. This was just a little fun to fill up the sprue, but I rather like it hanging above the door.

The wall panels in the pictures are prototypes for the castle interiors, although the windows will eventually be a different shape and will have frames in them before too long. I used a couple to establish the furniture, painting them in much the same way. The addition of some Vallejo Red Oxide hinted at a crumbling wall surface above the wood panelling and what with the addition of some paintings and trophies the illusion was complete.


With the offices underway, James turned his attention to a couple of items that might be useful for the barrack room, namely some bunk beds and individual lockers. These haven’t been painted yet, but the rawness of the scorched MDF rather suites the utilitarianism of the furniture. That said, I might spring* for a mattress or two before the end.


*No pun intended.

Click button for all related posts
Wow you really are going all out with this!!
ReplyDeleteThank you, that was exactly the response we wanted - just need to keep the enthusiasm up now.
DeleteFantastic work by both of you Michael, really bringing the interior to life. Send me a message about the mattresses mate I should be able to help on that
ReplyDeleteThank you Dave and will do, that sounds brilliant!
DeleteWow! That does look awesome Micheal!
ReplyDeleteChristopher
Thank you so much Christopher.
DeleteThis looks terrific, nice work.
ReplyDeleteThank you so much.
DeleteI'm very impressed with the seed of progress you're making on this project and your abilty to seemingly rpoduce anything needed on demand.
ReplyDeleteThese additions look great !
Thank you so much Joe, James is just amazing to work with, often coming up with the most amazing ideas and solutions to problems I haven't even thought of yet.
DeleteSeems to me there is ample wall space left in the commondant's office for a Fallen Madonna with the Bog B00bies....
ReplyDeleteThat Sir is inspired and rest assured she will be there on the day!
DeleteGorgeous...and very atmospheric!
ReplyDeleteThank you very much Phil.
DeleteThat is all kinds of brilliant! Just amazing stuff Michael 😃
ReplyDeleteYou are incredibly kind Ivor, thank you.
DeleteGreat details for the castle's interior :)
ReplyDeleteThank you Tamsin, we are starting to make genuine progress.
DeleteHoly smokes...amazing work Michael.
ReplyDeleteThank you so much Greg, both of us are really enjoying the process.
DeleteWow! Very cool, Michael. Love all the little details in that room - particularly the skull mounted on the wall!
ReplyDeleteThank you Dean, the trophy skull took longer to paint than the walls. :D
DeleteWow! A very exciting project! Look forward to seeing more. Well Done!
ReplyDeleteThank you so much Mr. Mouse, hopefully more updates soon.
DeleteBrilliant...but why the Picture of Charlie Chaplin on the Office wall?
ReplyDeleteNice 'graphic' pun, Mr. Pun Meister.
DeleteI did wonder about putting some graffiti on the portrait, but I quite like the idea of putting Chaplin up instead, perhaps a pin up calendar as well?
DeleteSuper nice!
ReplyDeleteThank you so much Jay.
DeleteBrilliant!
ReplyDeleteThank you my good man.
DeleteThat's awesome Michael!
ReplyDeleteThank you so much Michal.
DeleteGreat!
ReplyDeleteThank you Alex and lovely to hear from you.
DeleteVery well done! Truly a work of art!
ReplyDeleteWell that's very kind, thank you.
DeleteLooking good!
ReplyDeleteThank you so much Terry.
DeleteLooking absolutely superb Michael! Really am looking forward to the final product. Also as it happens I do have one of those 3D printed cars with a minor flaw knocking about. If you want to I can add a dust cover and send the whole thing on to you. I‘m sure you could find a place for it on Schloss Itter. You‘ve only to paint it yourself. If interested get in contact under moiterei[at]web[dot]de
ReplyDeleteThank you Nick and I have just sent you a cheeky email. ;)
DeleteThe more you post about this magnifique project the more I'm liking it!
ReplyDeleteGrand work Sir M.
Thank you so much Ray, really enjoying ourselves at the moment.
DeleteLoving everything here. Very cool and damned inspiring at that. I got a lot of doll's house furnishings in 1/50 (I believe) for when I get started on (yet) another project, but I am liking these mdf examples very much.
ReplyDeleteThank you Dai, looked at a few dolls house pieces ourselves, the gramophone being one of them. They often come up a tad large, but easier to see. :D
DeleteGood grief! You're going above and beyond with this. Excellent work.
ReplyDeleteThank you so much A.J. just need to remain focussed.
DeleteSuperb!
ReplyDeleteThank you Kym.
DeleteI say, this is looking fantastic. +1 for the Fallen Madonna.
ReplyDeleteThank you Barks. The +1 is noted, will need to sort that out. :D
DeleteAbsolutely fabulous! I thought it was a photo when I first saw the top picture :-0
ReplyDeleteThank you, that's the best compliment you could give.
DeleteWow Michael. The end results look amazing.
ReplyDeleteThank you so much my good man.
DeleteTerribly impressed, Michael, by both yours and James' hard work. However...
ReplyDeleteIt occurred to.me last night that the addition of a 'Cow Disguise' card and suitable figure (wearing wellingtons, naturally) is something that needs to be done. I think Warlord do a sprue of farmyard animals in a suitable scale so get to work, my good man.
Jez, thank you so much! We are clearly have a lot of fun, but there is always time for a bit more frivolity and the pantomime cow idea is just hilarious and inspired!
DeleteCan't claim originality on this one, as I stole the idea from the Val Kilmer-staring movie 'Top Secret'.
DeleteI can'tclaim originality on this one, as I dtole the idea from the movie 'Top Secret'. The cow disguise was used to get into the castle to turn off the electric fence.
DeleteNow I thought you were referencing the cow disguise used by the Airmen in Allo Allo? Off to google Top Secret!
DeleteJust found this:
Deletehttps://www.wargamesfoundry.com/collections/christmas/products/christmas-panto
What a useful pack. The female Robin Hood would go well with your Grail Knights along with Little John. And that pantomime horse is perfect.
DeleteWow that is fantastic, well done.
ReplyDeleteThank you so much Frank.
DeleteFantastic progress and stunning finish already!
ReplyDeleteBest Iain
Thank you Iain, we are slowing starting to tick off some of the problems that we were faced with.
DeleteI doubt I can say anything thats not been said but this is awesome, look foward to seeing more.
ReplyDeleteThank you, really appreciate it.
DeleteBrilliant work Michael, I think we knew this project would allow you to show your considerable skills to the full. Looking forward to the next instalment 🙂
ReplyDeleteThat is incredibly kind Matt, we are thrilled with the recent progress, but conscious that we need to keep the momentum going.
DeleteThese turned out really good. I am impressed with how good they look and bring the interiors to life.
ReplyDeleteThank you Simon, we knew we wanted a few interiors for the lecture, but this might inspire us to do some more.
DeleteStunning work! Incredibly detailed :-o
ReplyDeleteThank you so much!
DeleteWow, that is some impressive dedication.
ReplyDeleteAll these details makes it look almost authentic, like props for a movie.