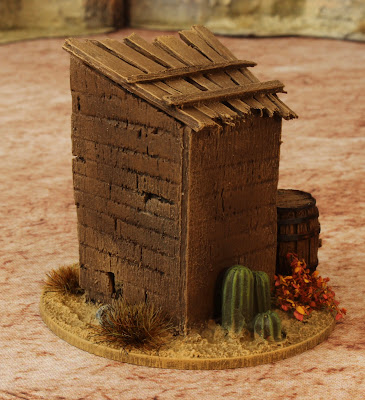
With the main village buildings for our game of Shoot 'N' Skedaddle completed, and in good time I might add, there was an opportunity to add a little local colour in the form of a few 'extras'. The first of these pieces was the ubiquitous outhouse, a seemingly ever present motif in the western films of my youth, the crude, hastily constructed structure was often festooned with flies and proved to be the last stand for many an unsuspecting outlaw; one of those silly things that I just had to have a go at building! After sketching out a rough design, I started to build the basic structure on a 60mm MDF base using scraps of balsa wood into which I etched a plank design.

I couldn't dismiss the idea of having a working door, which started life as a scrap of mountboard, cut to give the impression of reclaimed planks with some additional supporting braces. With the moon motiff scratched in, a little nod to another 'famous' outhouse, albeit from animated gem that is Shrek, I set about fashioning the hinges. These were essentially paperclips cut down to size and bent to form the staples fixed into the door frame and then a couple more pieces formed into hooks to attach the door. Although not the perfect solution, it did work and allowed me to move onto the painting and detailing of the base.
This part was a lot of fun and the bits box unearthed a good selection of miscellania to give some additional colour to the piece with barrels, plastic cacti and even a bucket to put under the seat. With a slightly troubling level of detail, I even carved a hole into the seat and added to toilet paper using pieces of tissue paper.
Next up was the village well, which I remember from the Magnificent Seven as being the venue for the stirring speech by Horst Buchholz playing the irrepressible Chico. I was about to start scratch building when I remembered that I had bought a
'Sarissa Precision' fountain from the 'Streets of Rome' range. I had imagined that this was going to form part of a war torn city for my 'wintery' Russians to fight over, but I had never got around to it, but with a little imagination it may find a use here.
Hastily assembling the kit, it became apparent that the ornate central fountain was a little too much for my sleepy Mexican village and so I decided not to site the central column, instead I offset part of it to one end and added a little 3D printed water pump that had surfaced earlier during my excavation of the bits box.*
*I can't say with any certainty where this piece had come from, but I found an almost identical version here https://shop.winterdyne.co.uk/product/cast-iron-water-pump
It was starting to come together nicely, but I felt that the side detailing was still a tad ornate so out came the wood filler again to give a more worn feel to the piece. The base was then textured and the whole thing primed for the final stages.
Once painted to match the existing pieces, I filled the fountain base with some Vallejo water effects, lightly coloring the 'water' with a little blue ink.
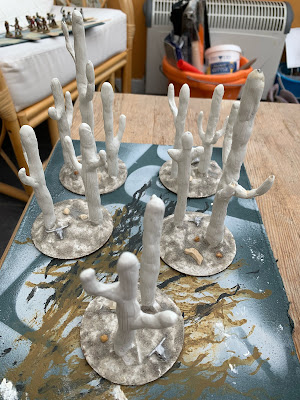
Now very much on a roll, as it were, I decided to try my hand at another stalwart of the classic Hollywood Western, tumbleweed. On reflection this wasn't as successful as I had hoped, simply because it is a device that is rather relient on movement, but nonetheless a bit of fun to end the proceedings. Lengths of sisal string were cut and then the individual strands separated out before dipping in a bath of watered down PVA glue. Once the crude structures were dried, they were washed in a sepia tone to give a little more depth. This wasn't as successful as I had hoped as the PVA seemed to repel the ink, but enough colour remained to sell the illusion. With hindsight, I am wondering if some rubberised horsehair might have been a better solution?
Tumbleweed under construction!
All in all a hugely enjoyable series of diversions that added some fun talking points to the board. I am sometimes guilty of forgetting just how much fun scratch building terrain can be, always seemingly looking for the 'perfect fit' kit or model to adorn the board, when actually just adapting some of the shop bought kits can be great fun.


